Automated CI/CD
This tutorial describes a step-by-step approach to fully automate your Builds and Releases. You learn how to create a CI/CD pipeline triggered by git push only.
CI/CD plays a vital role in automating the software development workflow from writing code to delivering the final product. Continuous integration and deployment enable potential issues to be identified early, minimizing downtime and boosting software quality. This automation allows teams to introduce new features and resolve bugs more efficiently, improving their responsiveness to user demands.
Additionally, CI/CD enhances feedback loops with stakeholders, ensuring alignment with user expectations. It is an essential approach for teams striving to develop high-quality, fast-paced software.
Preparation
What you should already know:
What you need:
- Git account (e.g. https://github.com)
- An application that runs on Pergola, having a valid Project Manifest
- Two branches on the Git repository of this application, here we use 'development' and 'production'
Step 1: Define strategy
For this tutorial, we will use an approach with two Git branches linked to a dev and a prod Stage respectively:
| Git branch | Target |
|---|---|
| development | Is deployed to Stage 'dev' on every change |
| production | Is deployed to Stage 'prod' on every change |
This is a simple but common setup, which lets developers freely merge into branch development to publish changes for review by team members or project stakeholders. Merging into branch main is usually protected, because this is typically reserved for production releases.
In a real world project, there would most probably be more branches, Stages and steps in between for new features to reach production.
For the Project, we will enable Auto-Build, which will cover both Git branches.
For each of the Stages, we will configure Auto-Release including the individual branch mapping.
As example, we will use a project hosted in GitHub.
Step 2: Prepare Pergola Project
You can skip this if you already have a Project you can experiment with. Note, that you can create multiple Pergola Projects on a single Git repository if you like.
To create a Pergola Project, press the '+ NEW PROJECT' button on the start page or under the 'Projects' navigation. This will open a popup:
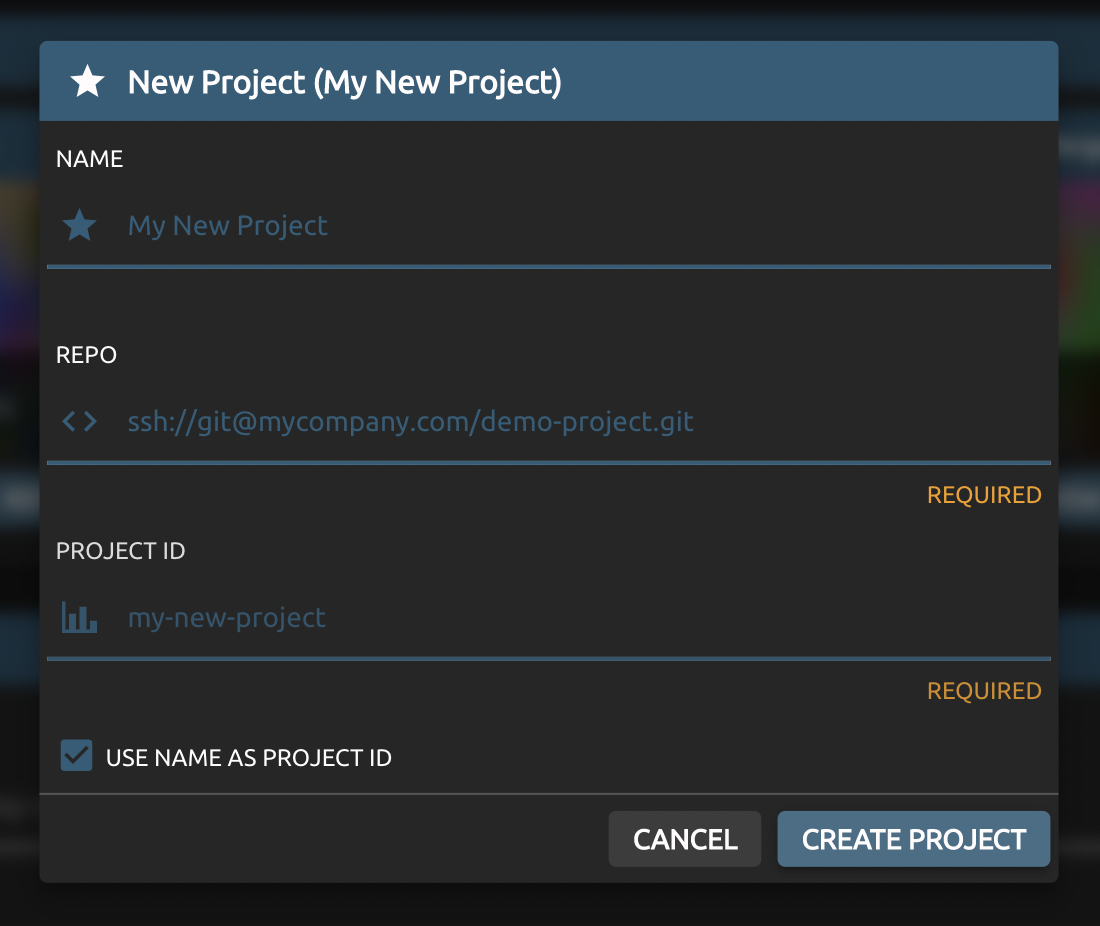
Make sure to trigger a Build manually first and verify it runs successfully.
See How to create a Project reference for details.
Step 3: Configure Auto-Build
Now, that we have a Pergola Project with a successful Build as baseline, we can start creating the automated CI/CD pipeline.
At first, we want Pergola to build every time you push to your Git repository. For this, we need to create a webhook in your Git repository that calls Pergola after a 'git push'.
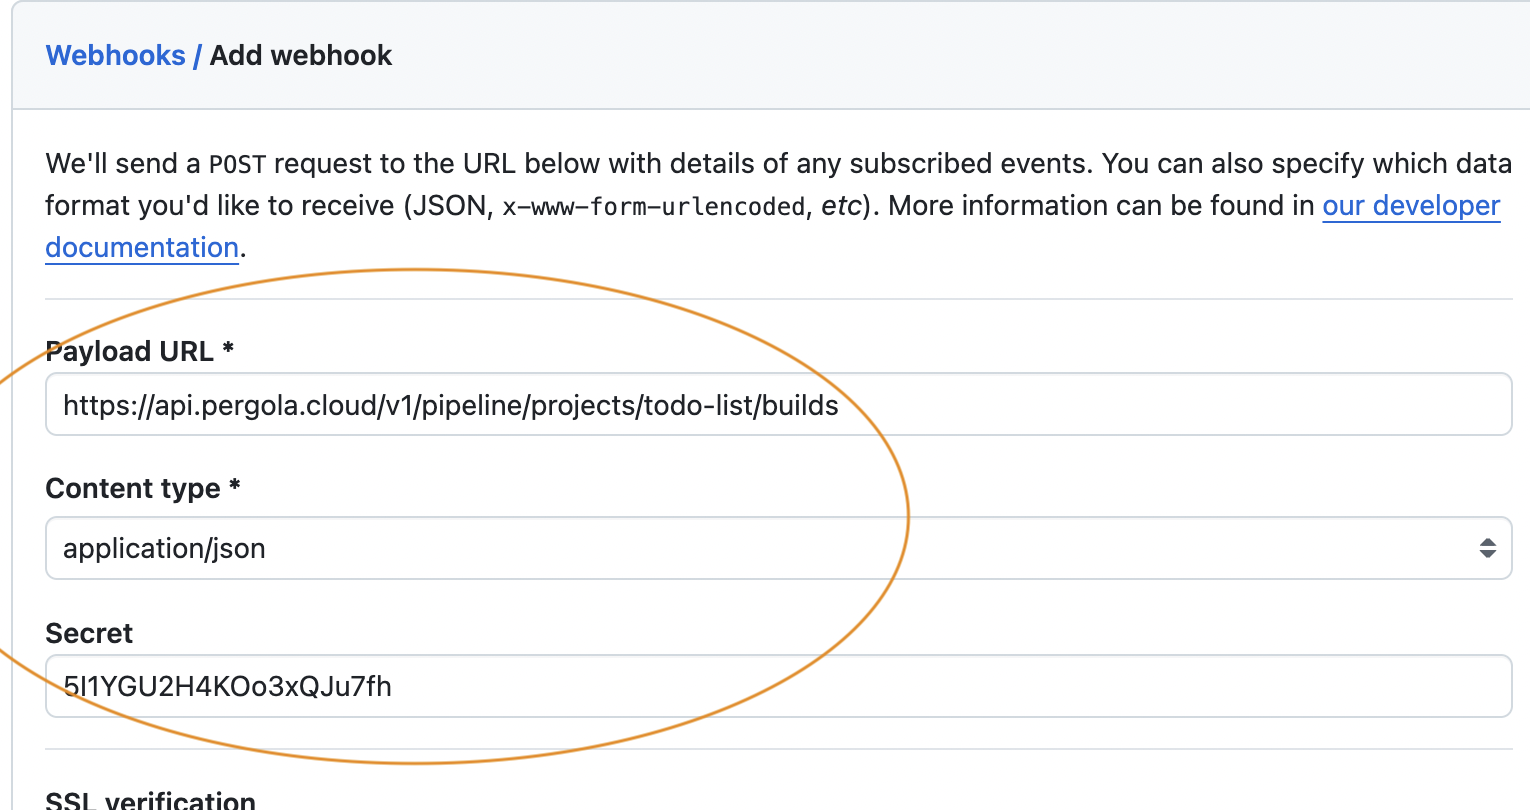
In GitHub, you navigate to your repository's settings page, click 'Webhooks' and then the 'Add Webhook' button.
There you will need to fill a form with an endpoint from Pergola (called Payload URL in GitHub) and a corresponding secret. Additionally, you need to set the 'Content type' to application/json.
If you scroll down, there are other options which are usually prefilled correctly, e.g. for configuring the event to be sent by GitHub. In our case, we need 'git push' as event.
For other popular platforms like GitLab and Bitbucket, see link section below.
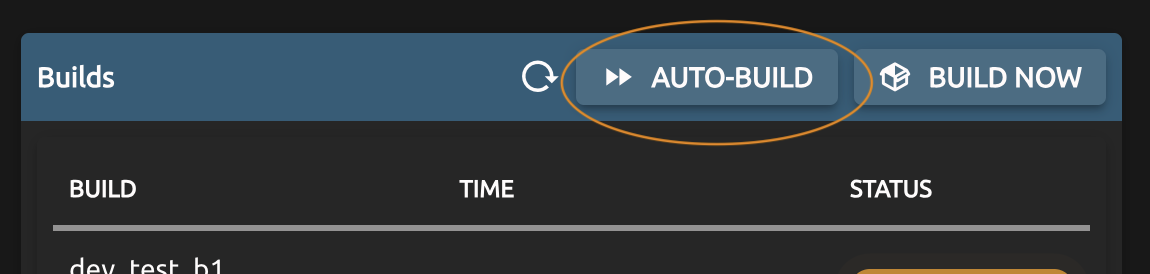
To retrieve the endpoint and secret from Pergola, you need to activate the Auto-Build endpoint by clicking on the 'AUTO-BUILD' button on the Project page:
You can copy both endpoint and secret from the appearing popup directly to GitHub:
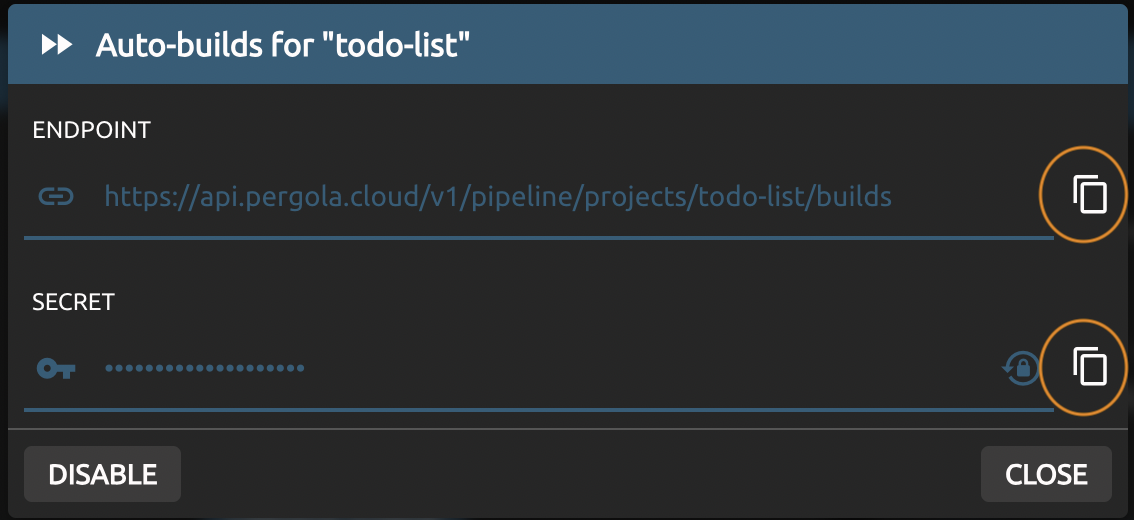
Finalize the setup by saving the new webhook in GitHub.
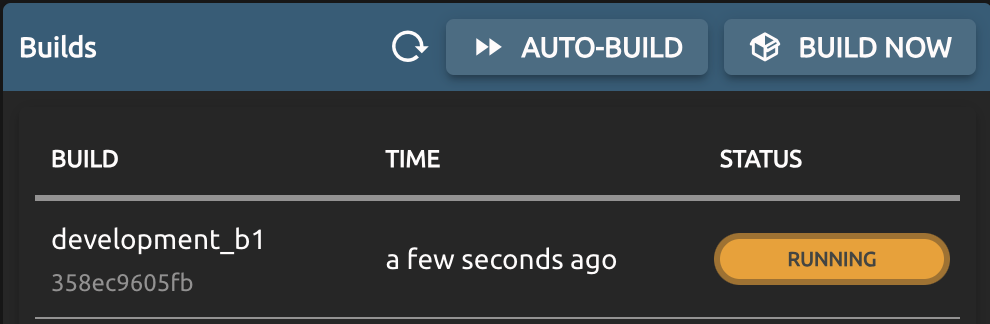
To test it, push a change to your Git repository and check if a Build starts in Pergola. The Build usually starts within a few seconds and usually takes a few minutes.
The example below shows a newly started Build after pushing to Git branch development:
See Auto-Build reference for details.
Step 4: Configure Auto-Release
Now that Builds are triggered automatically, we want Pergola to automatically release to a Stage after a successful Build, of course taking the Git branch into account.
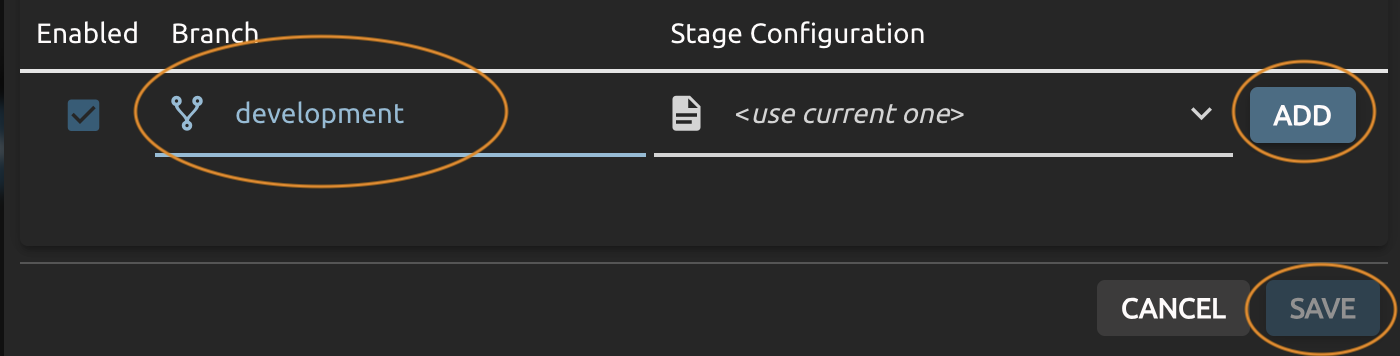
For this, you navigate to Stage 'dev' and click on 'AUTO-RELEASE':

In the popup, you type in 'development' as the name of the branch. For Configuration, keep the default 'use current one' for now:
As simple as that. To test it, push a change to your Git branch 'development', wait for the Build to finish successfully and then check if it was released to Stage 'dev' automatically.
Repeat the process for Stage 'prod' and Git branch 'production' to finalize your automated CI/CD pipeline.
See Auto-Release reference for details.
Step 5: End-to-end test
Now that everything has been configured, we can test our automated CI/CD pipeline.
Checkout branch development and commit a change.
Then execute a git push and wait a few minutes. Navigate to your Project's start page in Pergola, check if a new Build has been successfully completed and deployed directly. It could look like this for the 3rd Build on branch development:

Conclusion
- You successfully created a working CI/CD pipeline based on Git and Pergola.
- Whenever you push to your branch 'development', the result will appear on Stage 'dev'.
- Whenever you push to your branch 'production', the result will appear on Stage 'prod'.