Projects
What is a Project?
A Project is the home for your application (use-case) on Pergola.
In order to get your application up and running, you need a Project first. This is the first step prior to building and deploying your application on Pergola.
Once setup, you can:
- build and run your application
- manage execution environments (Stages) with dedicated Configurations
- invite members for collaboration
- release updates on a regular basis
- share access to your application with your users
- monitor and gather feedback to prepare the next iteration
A Project is linked to your Git repository where your application code resides and requires a well defined Manifest which describes your full application stack.
Building blocks
A Pergola Project has these building blocks at least:
- Git repository where your application code resides
- a Dockerfile which can be built to run your application, or an existing container image (e.g. on DockerHub)
- one Project Manifest file that describes your application stack
Dockerfiles
As Pergola runs containerized applications only, you will either need one or more Dockerfiles, or pre-built and published container images (e.g. on DockerHub), or even both, which compile your full application stack, the so called Components. An application typically consists of multiple Components, for example a dashboard, an API backend and a database.
Manifest
In order for Pergola to understand and reliably manage your application stack, you also need to provide a Manifest file (pergola.yaml) within root of your codebase. This Manifest contains all the bits and pieces required to build, run and operate your application.
A very basic pergola.yaml consists of a Component referencing either a Dockerfile within your codebase, or an existing container image. Following example outlines both in one Manifest:
version: v1

components:
- name: web
  docker:
    file: Dockerfile
- name: db
  docker:
    image: postgres:16
The Manifest is the only file within your codebase that is Pergola specific. Anything else remains Pergola-agnostic and thus ensures easy testing and debugging locally with tools and tech you are familiar with, or even deploying to other environments.
Example: Code structure
A simple Python application could have a code structure like this:
├─ app                   # your application code, dependencies, etc.
│  ├─ main.py
│  └─ requirements.txt
├─ Dockerfile            # compiles a container image containing your application (including all scripts, libraries and OS packages required at runtime)
├─ pergola.yaml          # the Manifest which describes your application stack (Components including their build and runtime Configuration)
└─ README.md             # a helpful guide about your app for your fellows (optional, but recommended for a well documented code repository)
Configuring Git repository
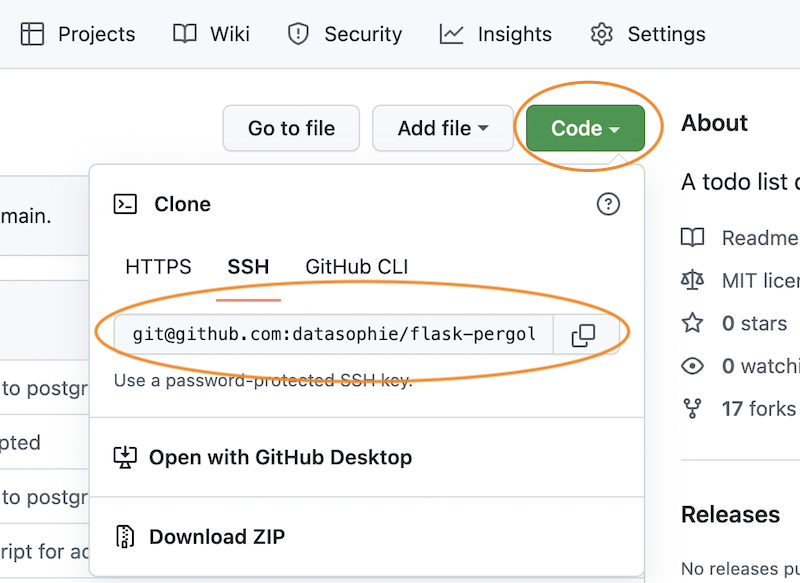
When creating a new Project you need to provide the Git clone URL to your source code. This URL is typically not the one you see in the address bar of your browser, but rather a URL you can copy from your Git repository's frontend.
Example on GitHub
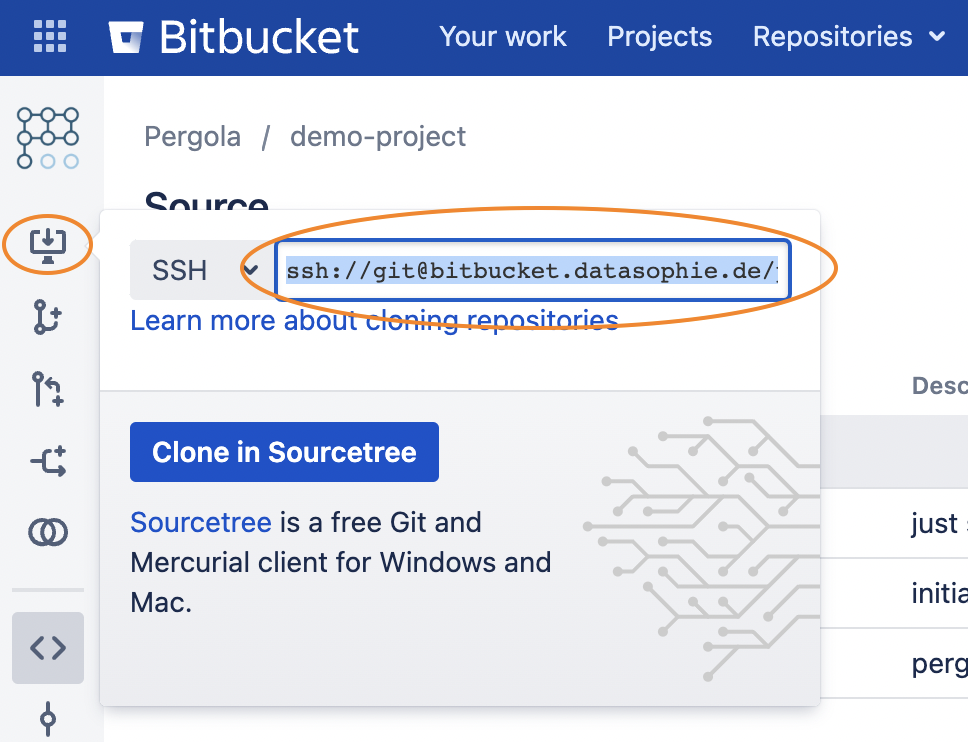
Example on Bitbucket
Clone URL: SSH vs. HTTPS
We always recommend using the SSH clone URL. An SSH based clone URL typically starts with a ssh:// or git@.
If your Git repository is public, means, read-only accessible by anyone within your company's network or even via the Internet, you can safely use the HTTPS clone URL either. For any other type, or if you are not sure, just use the SSH clone URL.
Please make sure Pergola can access your repository and has read access to it. Otherwise, Pergola won't be able to build your Project. If you are not sure if and how to configure this, please contact your Pergola administrator.
How to create a Project
Example for Web UI
Press the '+ NEW PROJECT' button on the start page or under the 'Projects' navigation. This will open a popup:
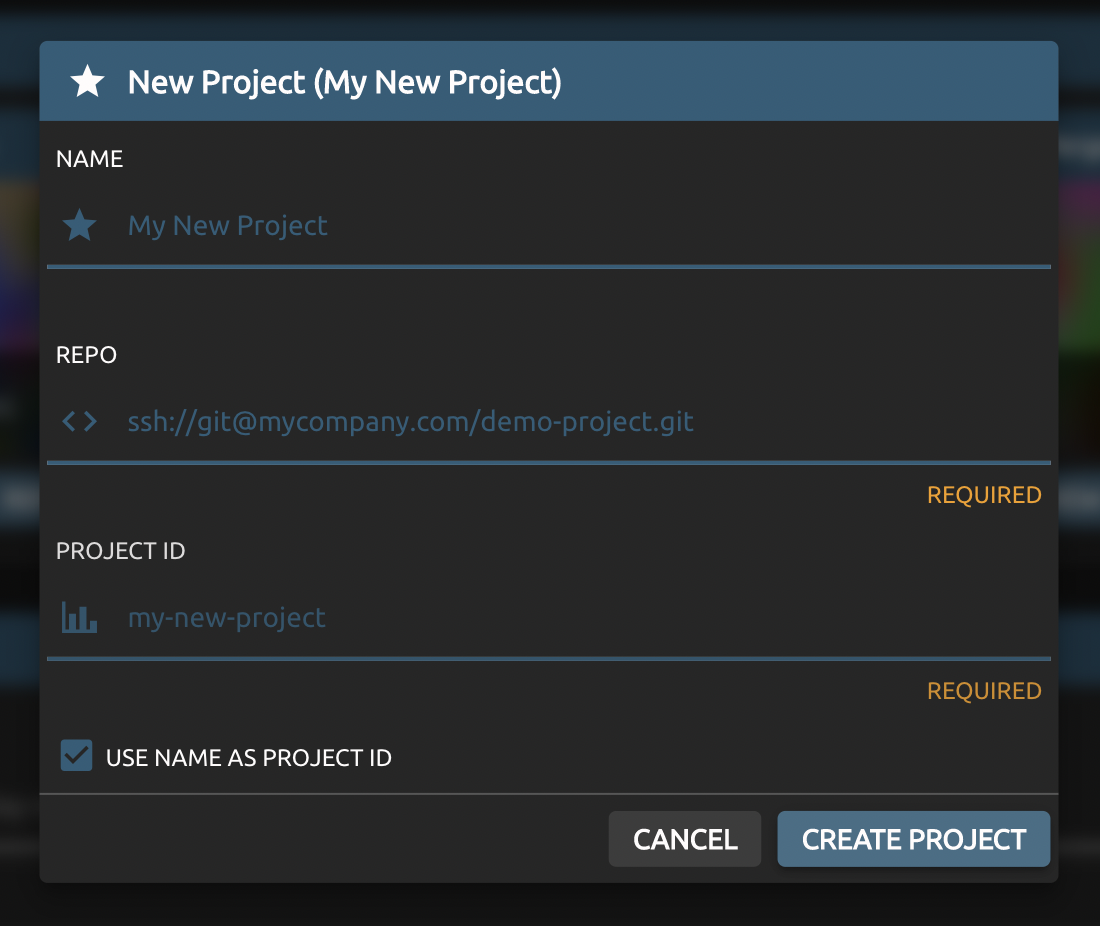
- Name is a user friendly display name for your Project, as visible on the UI
- Repo is the clone URL to your Git repository
- Project ID is a unique identifier for your Project
The Project ID must be unique as it will be used for links (URLs) to resources within your Project. Usually this is automatically derived from the display name provided, though you can override it with a more pleasing ID if you prefer. Pergola will complain if the ID is already taken.
Example for CLI
pergola create project my-new-project --git-url ssh://git@mycompany.com/demo-project.git
You can retrieve existing Projects, including the new one just created, via:
$ pergola list project
┌─────────────────────────────────────────────────────────────┐
| project         | repository                                |
| ────────────────────────────────────────────────────────────|
| another-one     | ssh://git@mycompany.com/new-and-shiny.git |
| my-new-project  | ssh://git@mycompany.com/demo-project.git  |
└─────────────────────────────────────────────────────────────┘
Delete or restore a Project
If you do not need a Project anymore, you can delete it. To do this, navigate to the Settings of the Project to be deleted:

and press the "DELETE PROJECT" button.
If the Project has Stages, it will be archived first. You can restore it, including all Stages, without loosing any configuration or persistent storage until the actual deletion is due. An overview of archived Projects is available at the bottom of the Projects overview page:
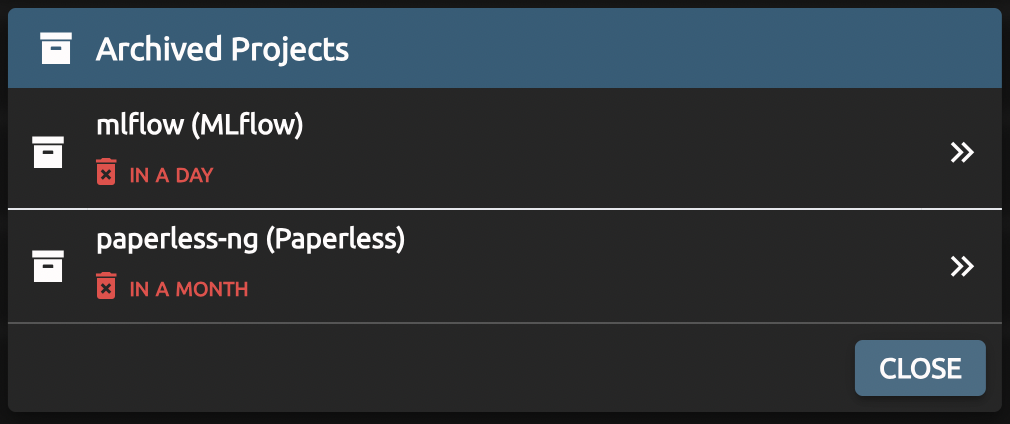
from where you can restore a Project.
The deletion due date depends on the Stages of a Project. The Stage with the longest retention period defines the deletion date for the entire Project and all its Stages altogether.
If a Project does not have any Stages, the Project will be deleted immediately. That also applies if all Stages have been archived.
Once a Project is finally deleted, all its Stages including any data is lost irrevocably.