Getting started
Let's setup & create your first Pergola Project in less than 5 minutes.
Preparation
Pergola runs any application ( e.g. from Python, Java, R, Kotlin, C, etc. ) that comes with a valid Dockerfile.
It needs to be available in a Git repository.
And, of course, you need to have access to a Pergola platform and a personal account.
Getting started
Create a Pergola Project
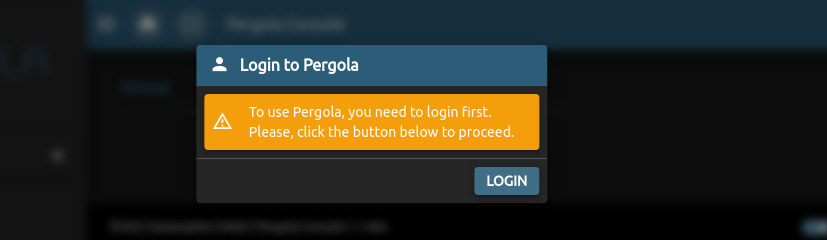
Go to Pergola UI and log in.
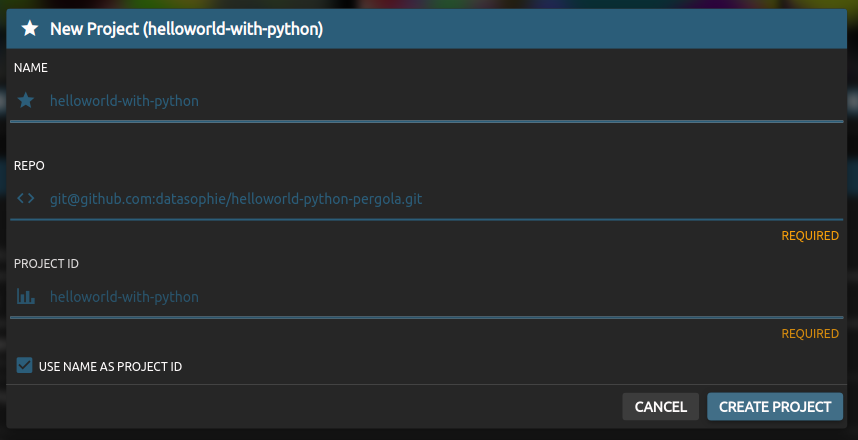
First, create a new Project. This is the wrapper around your execution environments.
Click on New Project. The screenshots show an example from Pergola's Hello World Tutorial and uses this repository: Hello World @ Git

Fill the form. You will need your git clone URL and you can assign a name to it.
Second, create a new Stage. This is your first execution environment where you can run your app. Click on Create Stage
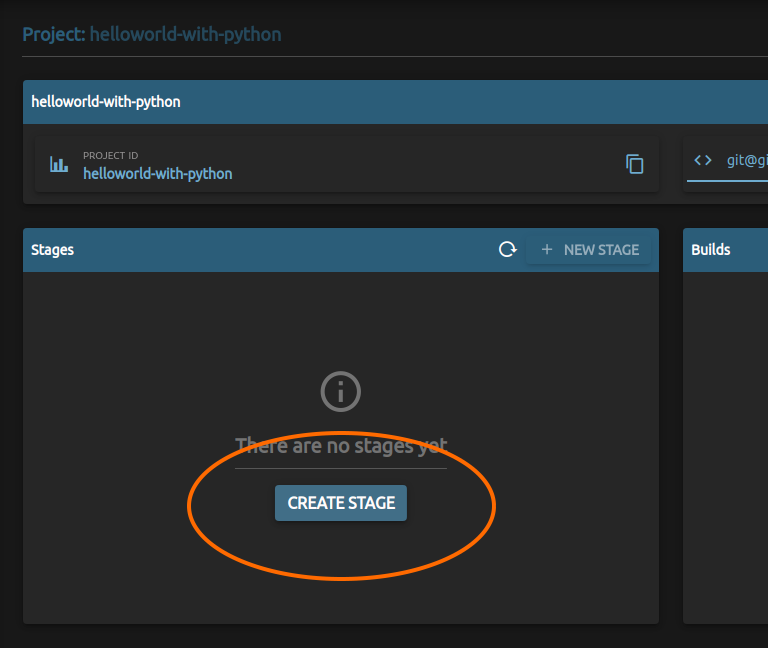
Fill the form. Choose a Stage name and choose type dev

Note, you can follow exactly these steps and use our public GitHub repository for testing your first Pergola application.
Conclusion:
- Pergola is ready to run your app
- But it does not yet know the resources (in other words: hardware and network) your app needs. See the next section for this.
Create a Project Manifest
The Project Manifest (pergola.yaml) is a descriptor added to your application, that tells Pergola what your app needs to be able to build and run.
The Pergola Hello World application uses this Project Manifest:
version: v1

components:
  - name: hello-world-runner
    identity: message-handler
    docker:
      file: Dockerfile
    resources:
      cpu: 100m
      memory: 0.5Gi
    scheduled: "@release"
This text needs to be pushed to the git repository of your app as file pergola.yaml.
Note: The Project Manifest is unobtrusive by design. Your application still runs everywhere else, not only in Pergola.
Conclusion
- We can start the application in Pergola now.
Build and Release the app
All preparations are done. Now, we want to run our application in Pergola.
To run the application, it first needs to be built.
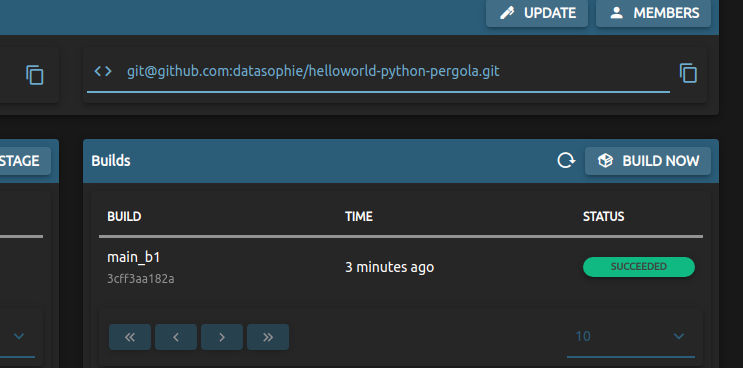
Just click Build now
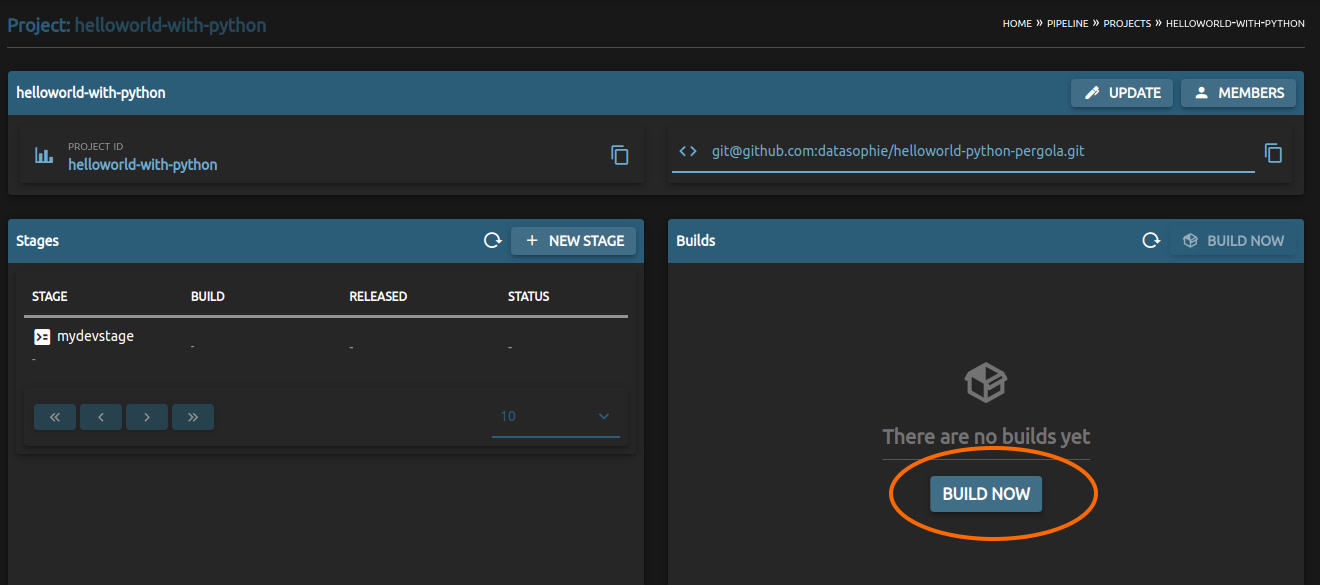
It might take a minute or so, but you should see a new succeeded Build. Click on it!
This leads you to the Build detail view where you could do troubleshooting with the Build logs. For now, click Deploy to get the built app version running.
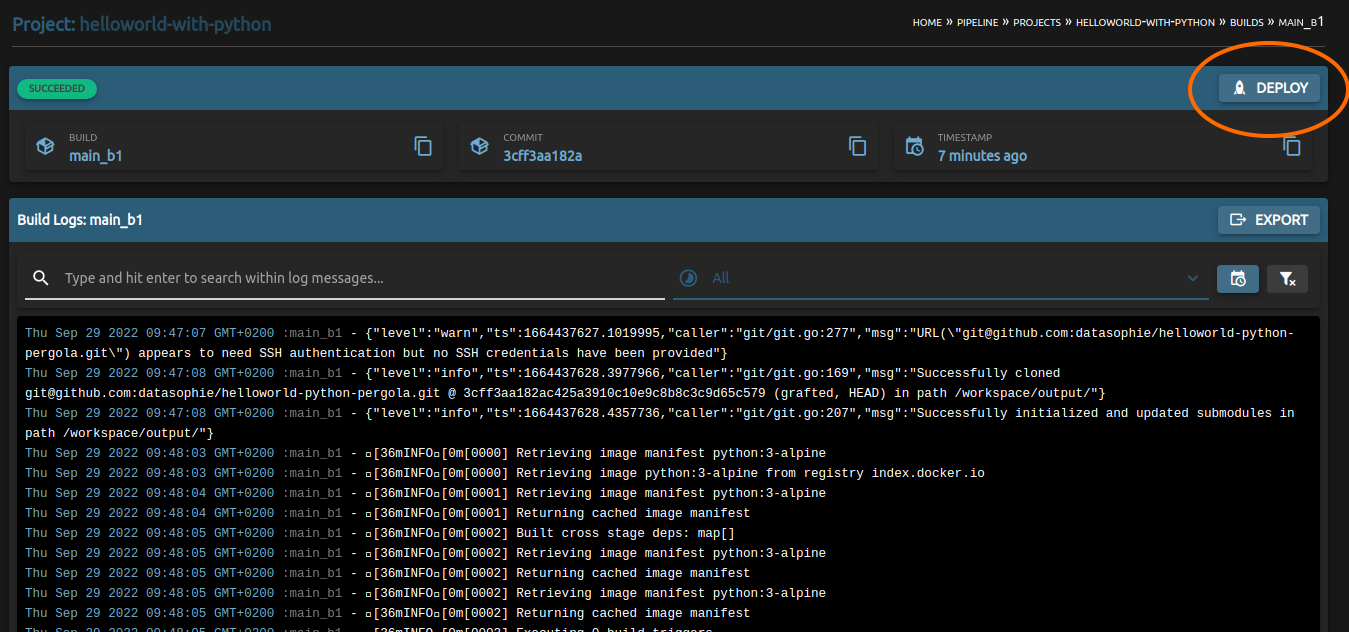
Select the Stage and affirm the deploy by clicking Continue

Congratulations, the Hello World application is running now.
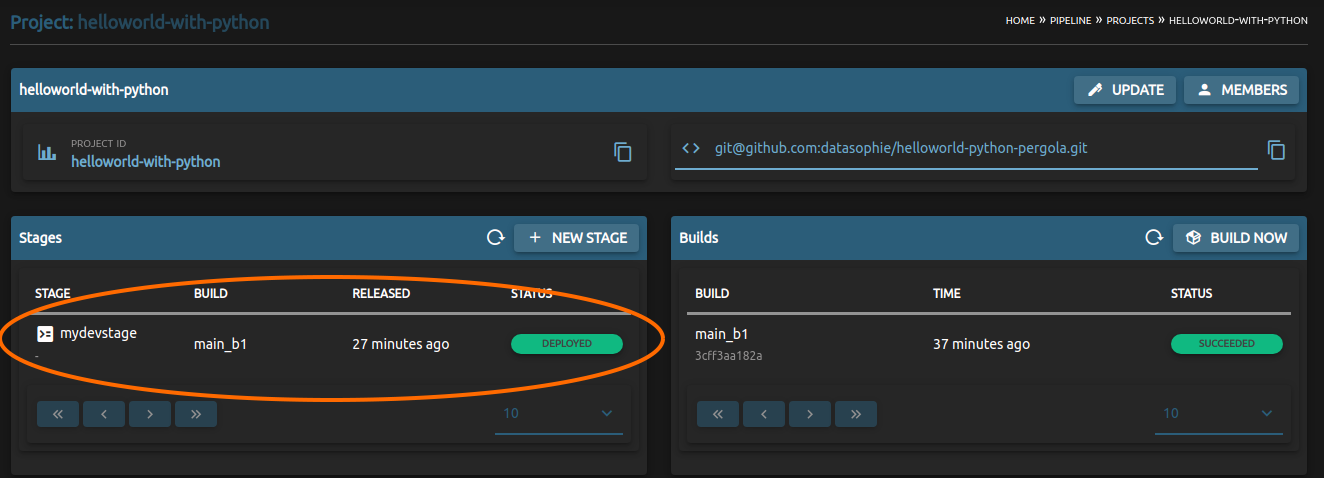
See the results
To take a look at it, navigate back to your Project view and go to the Stage detail view
There, you see the single Component we declared in pergola.yaml named hello-world-runner. You can click on the logs-icon on the right to see your Hello-World-Output.
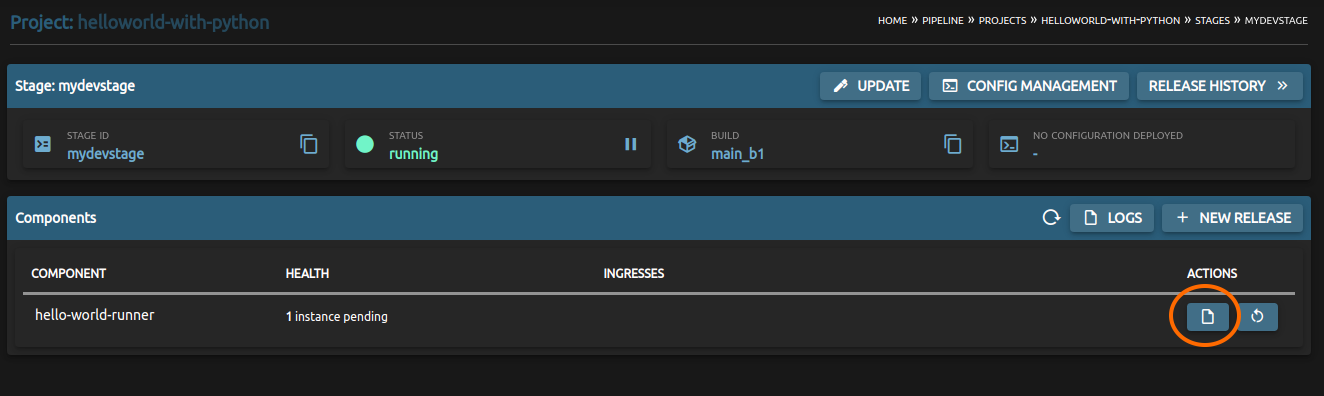
There it is.

Conclusion
- You successfully created and deployed your application on Pergola.
Further Reading
For a more detailed tutorial, please refer to: Hello World Tutorial